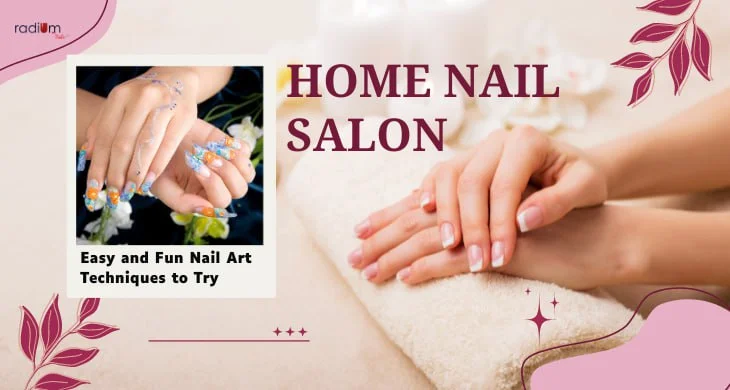
Are you looking to spice up your nails with some fun and unique designs? Well, you’re in luck! This blog is your go-to destination for unleashing your creativity through nail art. We’ve got a delightful lineup of five fantastic designs that you can effortlessly master at home. Whether you’re drawn to delicate florals or sleek geometric shapes, there’s something here to suit every taste. Get ready to elevate your manicure game with these simple yet striking nail art ideas!
Floral Nails:
Floral nails are an excellent choice if you’re aiming for a dainty and feminine manicure. To achieve this look, begin by applying a base coat in your preferred color. Once dry, grab a fine nail art brush and carefully paint delicate flowers on each nail. You have the freedom to play around with various hues and flower designs to craft a style that reflects your personality. Whether you prefer vibrant blooms or subtle petals, the options are endless. Don’t worry if you’re not a professional artist—practice makes perfect, and soon you’ll be creating stunning floral nail art effortlessly. This versatile design is suitable for any occasion, from casual outings to special events, adding a charming touch to your overall look. So, why not indulge in some flower power and adorn your nails with blossoms that showcase your unique style and creativity?
Gradient Nails:
Gradient nails offer a playful and vibrant twist to your usual manicure routine. To achieve this look, begin by applying a base coat in your chosen color. Once dry, gather two or more additional shades that complement each other. Next, tear off a small piece of makeup sponge and apply the chosen colors onto it in stripes. Gently dab the sponge onto your nails, blending the colors together to create a smooth gradient effect. You can experiment with different color combinations and gradients, from soft pastels to bold neons, to suit your mood and style. Once you’re satisfied with the gradient, finish off with a layer of top coat to seal in the colors and provide a glossy finish. Gradient nails are versatile and suitable for any occasion, whether you’re heading to a party or simply want to brighten up your day. So, unleash your creativity and dive into the world of gradient nails for a fun and colorful manicure experience!
Polka Dot Nails:
Polka dot nails are a timeless choice for adding a touch of whimsy to your manicure. To achieve this look, begin by applying a base coat in your desired color. Once dry, select a contrasting shade for the polka dots. If you don’t have a dotting tool, you can easily create dots using the end of a bobby pin or a toothpick. Dip the tool into the nail polish and gently press it onto your nails to create the dots. You can experiment with different sizes and spacings of the dots to achieve various effects, from subtle and understated to bold and playful. For a fun twist, try mixing and matching different colors for a vibrant and eclectic look. Polka dot nails are versatile and suitable for any occasion, whether you’re heading to a casual outing or a special event. So, unleash your creativity and have fun creating your own unique polka dot nail designs!
Geometric Nails:
Geometric nails offer a sleek and contemporary look that’s ideal for anyone who appreciates clean lines and modern aesthetics. To achieve this chic design, begin by applying a base coat in your preferred color. Once the base coat is dry, use striping tape or nail art stencils to create geometric shapes like triangles, squares, or lines on your nails. Take your time to position the tape or stencil precisely to ensure crisp and precise lines. Next, carefully fill in the shapes with another nail polish color of your choice, making sure to stay within the boundaries created by the tape or stencil. Allow the polish to dry completely before gently removing the tape or stencil to reveal your flawless geometric design. You can experiment with different color combinations and shapes to customize your geometric nails to suit your style and preferences. Whether you prefer bold and graphic patterns or subtle and understated designs, geometric nails offer endless possibilities for creativity and expression. So, grab your nail art tools and unleash your inner artist to create stunning geometric nail designs that are sure to turn heads!
Water Marble Nails:
Water marble nails offer a captivating and artistic look that’s sure to catch everyone’s eye. To achieve this stunning effect, start by applying a base coat of your chosen nail polish color. Then, fill a small cup with room temperature water and carefully drop different colors of nail polish onto the surface of the water. Use a toothpick to gently swirl the colors together, creating unique patterns and designs. Once you’re satisfied with the design, carefully dip your nails into the water, allowing the polish to adhere to your nails. After removing your nails from the water, use a cotton swab dipped in nail polish remover to clean up any excess polish around your nails. The result is a mesmerizing and colorful marble effect that’s sure to impress. Experiment with different color combinations and swirling techniques to create your own custom water marble nail designs. With a little practice and creativity, you can achieve beautiful and eye-catching nails that are perfect for any occasion. So, why not give water marble nails a try and add a touch of artistry to your manicure routine?
Conclusion
With these simple yet stunning nail art ideas, you have the power to transform your nails into miniature works of art, right in the comfort of your own home. Whether you opt for delicate floral patterns, vibrant gradient designs, classic polka dots, modern geometric shapes, or mesmerizing water marble effects, there’s a nail art style to suit every taste and occasion. So, gather your favorite nail polish colors, grab your dotting tools and brushes, and let your creativity run wild! Experiment with different techniques, colors, and designs to create unique and eye-catching manicures that reflect your personal style. Whether you’re a nail art novice or a seasoned pro, these easy ideas are sure to inspire you and take your manicure game to the next level. So go ahead, express yourself through your nails, and have fun unleashing your inner artist!
Frequently Asked Questions
Ques. Can I use regular household items for nail art?
Ans. Yes, you can use items like toothpicks, bobby pins, and tape for various nail art techniques.
Ques. How much time does it take to dry water marble nails??
Ans. Water marble nails may take a bit longer to dry due to the multiple layers of polish, so patience is key.
Ques. Do I need special tools for geometric nail art?
Ans. While striping tape and nail art stencils can make creating geometric designs easier, you can also achieve similar results with household items like tape and toothpicks.
Ques. Can I mix different nail polish brands for gradient nails?
Ans. Yes, you can mix different nail polish brands to create gradient nails, but ensure they have a similar consistency for seamless blending.
Ques. How can I prevent smudging while creating nail art?
Ans. Allow each layer of nail polish to dry completely before moving on to the next step to prevent smudging and ensure clean lines.